
Instructions and tips for drawing a portrait
Learn to draw a portrait – instructions and tips for drawing a portrait
Learn to draw: step by step for beginners.
- What makes portrait drawing so special?
- Instructions and tips for drawing a portrait with a pencil
- Tips for drawing a portrait
- Observation and control - portrait drawing tips
- Select a suitable portrait drawing template
- The first step: determining the proportions
- The second step: eyes, nose and mouth
- The third step: the details
- The fourth step: the shading
- The fifth and last step: erase the highlight
What makes portrait drawing special?
The portrait is one of the classic and most popular subjects in visual art. It is also a challenging drawing exercise. Because our eyes are trained to recognize faces, we notice mistakes and inconsistencies quickly. Even when we can see that something looks wrong, it can be difficult to identify exactly why.

Capturing your own face or someone else’s with pencil and paper continues to fascinate people. Even in an age of readily available photos and selfies, portrait drawing remains a demanding artistic skill.
Drawing portraits can also provide a break from everyday life and a way to put your thoughts, feelings and creativity on paper.
Learn more: Commission your own portrait
How to draw a pencil portrait: instructions and tips
For your first portrait exercises, draw a person facing straight toward you. Unless you have a photographic memory, use a reference: either a person sitting for you or a photo you can study as you draw.

As a beginner, you don’t need to expect a perfect likeness. The aim is to learn how to draw a face and understand its basic proportions. With practice, you can produce a convincing face before learning to capture the features of one particular person.
Capturing someone’s distinctive facial features is a further challenge. Start by practicing the general principles of drawing people.
Tips for drawing a portrait
Before trying to capture a specific person, learn the basics of facial proportions. Every face is different, but many underlying proportions are similar. Beginners also tend to make certain common mistakes.

Pay attention to the height of the forehead and the position of the eyes. Beginners often draw the forehead too short and place the eyes too high. The eyes sit roughly halfway down the head. Hair can make these proportions harder to judge. I often made the same mistake when I first started drawing faces.
The nose can serve as a rough measuring unit. The eyes divide the height of the head into two halves. In this simplified approach, the forehead is about two nose lengths high, the nose is one, and the mouth and chin together are another. That makes roughly four nose lengths in total.
I recommend using a grid, especially when you are starting out or drawing without a reference. Pencil is a useful medium for practicing faces.
Portrait Drawing Created With Care
Portrait drawing begins with careful observation. Start with simple shapes and proportions, then build the features, values, and details gradually instead of trying to finish everything at once.

At Sketchus, real artists create every commissioned portrait by hand. We do not use an AI filter or an automated photo effect.
Choose your preferred style and size, upload your reference photos, and tell us what matters most to you. If you are unsure about your photo, our team can review it before you order.
Choose a suitable reference photo

Artists in past centuries worked without photographs, which brought both an advantage and a challenge. Anyone who wanted a portrait needed an artist to paint it, creating demand for commissions. But a live model moves, making it harder to draw another person or a self-portrait.
Step 1: Establish the proportions
A hard pencil is useful for marking proportions. For this exercise, I use a MONO H2 pencil. Use light guidelines, circles and lines to establish the proportions of the head.
Drawing a woman’s face: portrait practice

Tip: The eyes sit roughly halfway down the full height of the head.
Step 2: Eyes, nose and mouth
Learn more: How to Draw an Eye: A Simple Guide
Use light pressure and keep the shapes simple. Mark the positions of the facial features with triangles, circles and ellipses. At this stage, focus on the basic shapes rather than fine details. An HB pencil works well for this step. Once the features are in place, erase the guidelines you no longer need.


Portrait Drawing Created With Care
At Sketchus, real artists create every commissioned portrait by hand. We do not use an AI filter or an automated photo effect.

The fourth step: the shading
Now that your drawing has expression and personality, you can add more shading to a softer pencil. This gives your portrait drawing more contrast and liveliness. The pencils with the hardness grades 4B & 6B are ideal for this. This part of the drawing gives me the most pleasure personally.
Step 5: Erase the highlights
If you shaded over the lightest areas of your drawing, use an eraser to reveal the white paper again, for example on the tip of the nose or the lips. This adds contrast and definition. You can use a compass to add a circle as a design element, letting the figure extend slightly beyond it to complete the portrait.

Looking for a distinctive portrait that reflects your personality or captures someone you love? Our artists create pencil portraits from reference photos, with attention to the details that make the subject individual. Explore the available options and current prices on the product page.

Commission your own portrait — choose production options when ordering
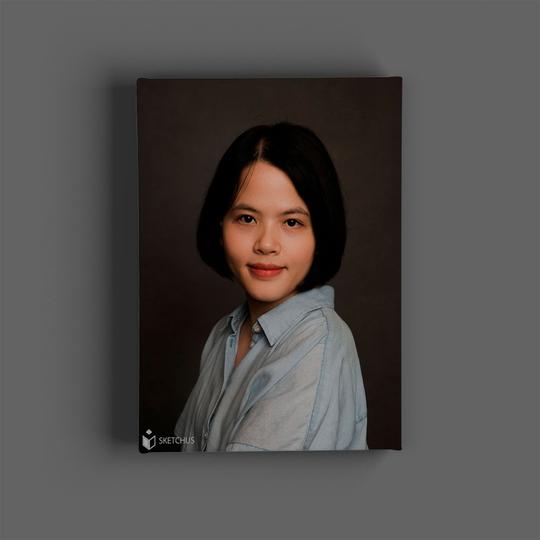
Hoa Tran , Sketchu's artist😊😊😊
My husband Tu Ho & I, we draw each of your templates as a high-quality portrait and can also create many of your pictures into a great work of art. You can find examples and prices here and configure them directly online😊